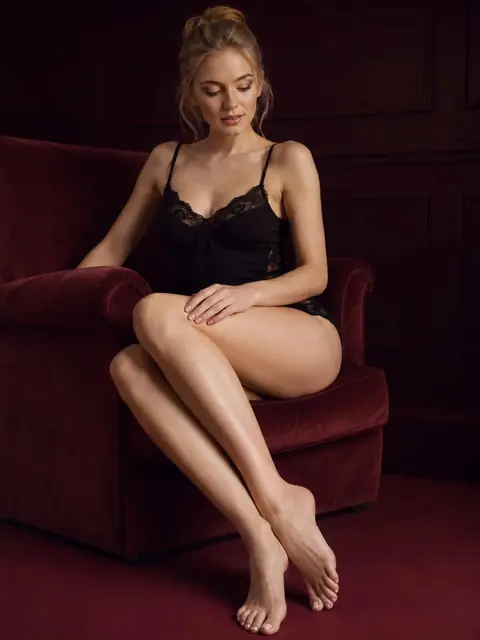
Feet photography media collection

Feet Photography: Pictures, Ideas, Poses & Lighting

Explore feet photography pictures and videos. Compare creative ideas, poses, lighting, backgrounds, close-ups, black-and-white styles, and camera angles.

Decide what the frame should reveal

Build a Feet Photography Composition Around Shape and Space

A strong composition gives the feet a clear role in the frame. Crop, camera height, perspective, and negative space decide whether the viewer notices fine detail, the complete foot shape, or the relationship between feet and setting.

01

Close-Ups for Texture and Detail

A close-up can isolate nail color, skin texture, toe shape, jewelry, or the transition from forefoot to arch. Front-facing views make width and alignment easy to read, while side and three-quarter angles reveal depth and contour. Leave a small amount of space around the subject so the toes or heel do not feel accidentally cut off. When the camera is very close, perspective can exaggerate whichever part is nearest the lens; stepping back and cropping later produces a more balanced proportion.

02

Full-Foot and Lower-Leg Framing

A wider crop connects the toes, arch, heel, ankle, and lower leg in one continuous shape. Side profiles clarify the foot's outline, overhead views emphasize placement and symmetry, and a low angle gives foreground details more visual weight. The frame should be wide enough to show the intended line but tight enough that the background does not become the subject. Before shooting, decide whether the composition ends at the ankle, includes part of the calf, or uses the surrounding scene as context.

03

Paired Feet, Balance, and Negative Space

Two feet can create symmetry, repetition, or a deliberate contrast between poses. Keeping them parallel produces an orderly composition; offsetting one foot separates the silhouettes and adds depth. Crossed ankles form a compact shape, while a small gap between the feet preserves each outline. Negative space is especially useful around pointed toes or an extended foot because it gives the direction of the pose somewhere to continue.

Shape texture, color, and contrast

Choose Lighting That Supports the Feet Photography Idea

Lighting determines whether texture looks soft or pronounced, whether polish and jewelry stay controlled, and whether the image feels natural, graphic, warm, or dramatic. The best setup is the one that makes the intended detail easy to see.

01

Soft Light for Even Detail

Large, diffused light creates gradual transitions across toes, arches, and ankles. It is useful for clean studio pictures, natural skin detail, and polished looks where harsh highlights would distract from the shape. Place the light slightly to one side rather than directly above the camera to retain gentle contour. A pale wall, sheet, or reflector on the opposite side can soften deep shadows without flattening every curve.

02

Directional Light for Form and Texture

Light coming from the side makes raised areas brighter and lets shallow shadows describe the foot's structure. A lower angle can emphasize texture, sand, fabric, or water droplets, while backlight can define the outer silhouette. Directional light needs careful placement: if the toes cast heavy shadows over one another, turn the foot or raise the light until individual shapes remain readable.

03

Color, Reflections, and Black-and-White Photography

Color images can coordinate skin, nail polish, accessories, surfaces, and background tones. Reflective polish, oil, water, metal jewelry, or glossy shoes may create competing highlights, so check the brightest areas before choosing exposure. Black-and-white feet photography removes color relationships and puts more emphasis on line, tonal separation, texture, and shadow. It works best when the subject and background remain distinct even without hue.

Control gesture without forcing it

Feet Photography Poses for Relaxed, Pointed, and Moving Frames

A pose should support the intended mood and remain visually clear. Small changes in ankle rotation, toe tension, weight, and overlap can alter the complete silhouette more than a dramatic change of location.

01

Relaxed and Natural Positions

A seated, reclined, or standing pose with relaxed toes creates softer spacing and a less formal line. Let weight settle naturally, then make small adjustments to prevent one foot from hiding the other. An overhead view can show both feet and the surrounding surface, while an eye-level side angle feels more observational. Relaxed does not have to mean unplanned: check the edge of the frame, ankle position, and background distractions before capturing the final picture.

02

Pointed, Arched, and Crossed-Ankle Poses

Pointing the foot extends the line from ankle to toes and gives side-profile compositions a clear direction. A lightly arched pose can reveal more of the instep without making the toes look rigid. Crossed ankles create a layered arrangement that works in seated or reclined frames, but the rear foot should remain visible enough to read as a separate shape. Alternate between symmetrical and offset positions to see which better supports the composition.

03

Walking, Turning, and Transitional Moments

Movement introduces weight shifts, changing toe contact, and variations in the ankle line. A step, pivot, stretch, or transition from flat to pointed can feel more natural than a held pose. For pictures, allow room in front of the movement and capture several moments rather than relying on one exact frame. For video, keep the camera stable enough that the viewer can follow the gesture and see how light changes across the feet.

Give every detail a purpose

Studio, Outdoor, Barefoot, and Styled Feet Photography Ideas

The setting establishes context, while styling determines which smaller details carry contrast. A simple concept usually becomes stronger when the surface, background, pedicure, accessories, and footwear belong to the same visual direction.

01

Clean Studio and Minimal Backgrounds

A plain studio surface keeps attention on shape, pose, and lighting. White and light neutral backgrounds support soft editorial images; dark backgrounds can produce a more graphic silhouette when the edges remain separated. Seamless paper, fabric, bedding, tile, or a simple floor each creates a different texture without requiring a complicated set. Remove objects that do not contribute to the composition, especially near the toes and heel.

02

Sand, Water, Fabric, and Natural Surfaces

Outdoor and tactile settings can make bare feet photography feel connected to a place. Sand records pressure and movement, water adds reflections, and stone or wood creates a stronger texture contrast. Soft fabric introduces folds that can frame the feet or compete with them, depending on how busy the pattern is. In sandy feet photography, decide whether grains and footprints are the main detail or simply part of the atmosphere, then frame and light them accordingly.

03

Pedicure, Anklets, and Footwear

Nail color, anklets, toe rings, stockings, sandals, and heels can give the eye a secondary focal point. A single anklet is clearest when it has space around the ankle, while painted nails stand out most when their color contrasts with the surface or footwear. Bare feet keep the full outline visible; open shoes divide the foot with straps; closed shoes shift attention toward the ankle, instep, and overall silhouette. Choose a few coordinated details instead of making every element compete.

Fixed detail or changing gesture

Feet Photography Pictures vs Videos

Pictures preserve one precise relationship between pose, crop, light, and styling. Videos show how that relationship changes through movement, making the two formats useful for different kinds of visual research.

01

Pictures for Composition and Comparison

A still picture holds fine detail in place, making it easier to study framing, symmetry, shadows, nail color, jewelry, and surface texture. Use pictures when the success of the idea depends on one exact side profile, overhead arrangement, close crop, or black-and-white tonal pattern. Comparing several stills can also reveal how a small change in camera height or foot rotation alters the composition.

02

Videos for Motion and Light Changes

Video can show toes settling, ankles turning, feet crossing, a step beginning, or water and fabric moving around the subject. Highlights on polished nails, jewelry, or wet skin shift as the angle changes, revealing details that one frame may miss. Use video when the transition is part of the idea, and keep each clip focused on one readable action rather than combining unrelated movements.

AI-generated adult feet photography concept with soft studio lighting

Create a specific photography concept

Turn a Feet Photography Idea into a Custom AI Image

If the gallery suggests a direction but not the exact composition you need, use the AI Feet Pics Generator. Describe the adult subject, pose, crop, lighting, background, styling, camera angle, and realistic or illustrated finish you want, then refine the result around one clear visual idea.

Create a feet photography image

Common questions

Feet Photography FAQ

Practical answers about the collection, composition choices, lighting, poses, and media formats.

What types of feet photography are in the collection?

The gallery can include studio pictures, artistic close-ups, relaxed barefoot scenes, posed compositions, black-and-white images, styled looks, outdoor settings, and motion-focused videos. Available results depend on the public resources currently associated with the Foot Photography tag, and visible filters can be used to narrow the collection further.

What makes a good feet photography composition?

A good composition has a clear subject, deliberate crop, readable foot shape, controlled background, and enough space for the pose. Close-ups work when fine detail matters, while wider frames are better for connecting toes, arch, heel, ankle, and setting. Camera angle should support the feature you want to emphasize without creating distracting perspective distortion.

Which lighting works best for feet photography?

Soft, diffused light is a reliable choice for even skin detail and gentle contour. Side lighting gives shape and texture more definition, while backlight can strengthen the silhouette. The best option depends on the concept: reflective polish and jewelry often need softer highlights, whereas black-and-white or texture-led images can benefit from stronger tonal contrast.

What feet photography poses should I try?

Start with relaxed seated or standing positions, then compare pointed feet, a light arch, crossed ankles, offset paired feet, and simple movement such as a step or turn. Small adjustments often matter more than extreme poses. Keep both the complete silhouette and the intended focal detail visible, and avoid overlap that makes the position difficult to read.

Should I browse feet photography pictures or videos?

Choose pictures to inspect one fixed pose, crop, lighting pattern, styling detail, or background. Choose videos to study walking, turning, toe and ankle movement, and changing reflections. Browse both when you want precise composition references as well as a clearer sense of gesture and motion.